Windows Lock Screen Group Policy on Windows 10 Professional
If you are a small business or a company that is licensed for Window 10 Professional as opposed to Windows 10 Enterprise, there are some major differences in functionality. Particularly, enterprise functionality. In this post, we are going to talk about a simple Group Policy Object (GPO) to set the Windows 10 Lock Screen. There is an actual GPO to set the lock screen on your Windows 10 desktops (if you are licensed and running Windows 10 Enterprise as your desktop operating system). However, if you are running Windows 10 Professional, this policy will not work!
However, there is a way to configure Windows lock screen on Windows 10 Professional computers. This can be done by changing the proper registry keys.
Why would anyone want to change the Windows 10 lock screen via GPO anyway? Well, on occasion, your Marketing/HR teams might want to communicate specific events via a Windows 10 lock screen image. For example, they might want to remind associates to enroll for their benefits or maybe the company wants to display the company goals or perhaps it might be something as simple as display the company logo and colors. Whatever the reason, you can do this WITHOUT having Windows 10 Enterprise as your operating system.
Below are the instructions for setting and deleting the group policy that controls the lock screen.
Group Policy Name = Lock_Windows_Screen_Mktg
Configuration (User/Computer) = Computer
Steps to push Enable Lock Screen with new image
- Copy the image to a central repository that everyone has READ permissions. Ideally, you’d like to use DFS to distribute the image to local servers throughout your organization. (i.e. \\server\images\lockscreen,jpg)
- Create the GPO, name it whatever you want (i.e. Lock_Windows_Screen_Mktg). This will be a Computer GPO. In Computer Configuration, navigate to Preferences/Windows Settings/Registry
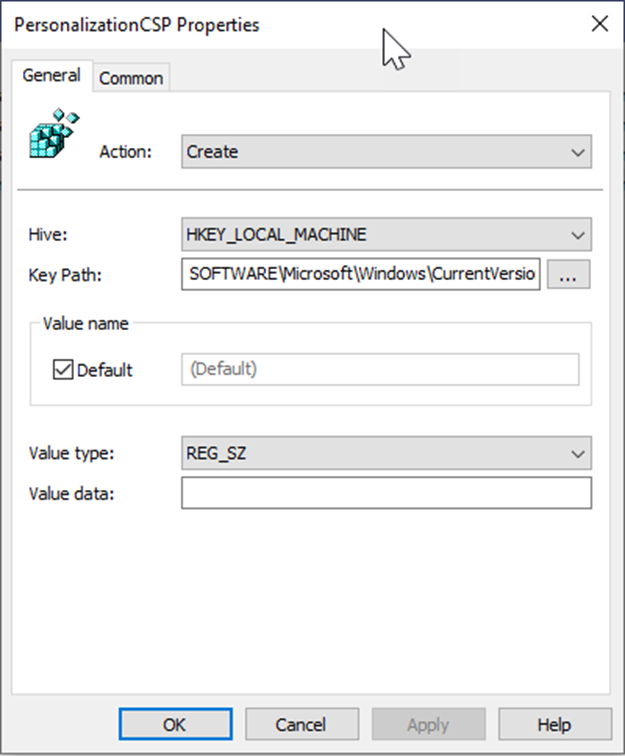
- Configure the following 4 registry entries. Please note the Action for each registry:
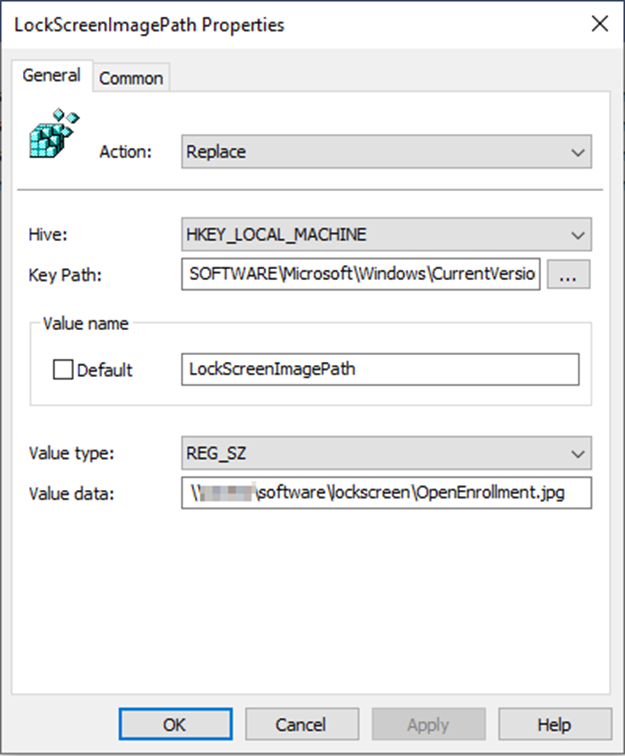
LockScreenImagePatch: Action=Replace
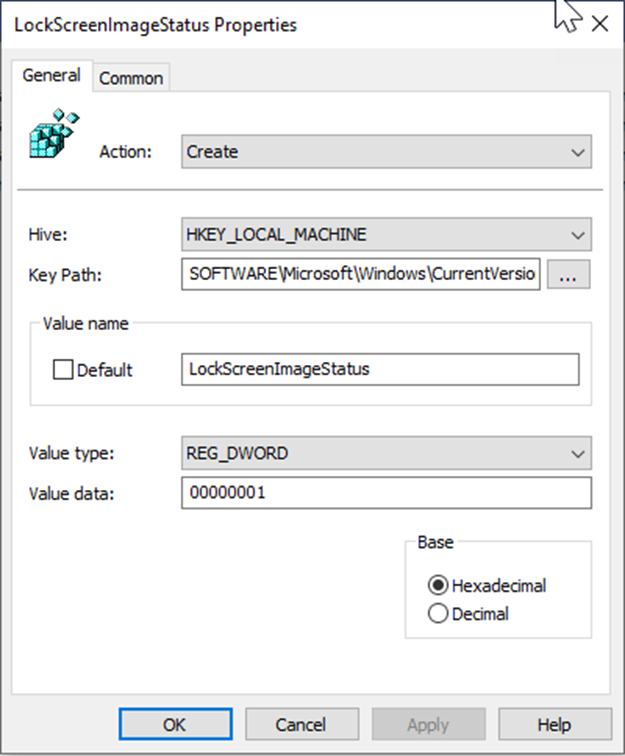
LockScreenImageStatus: Action=Create
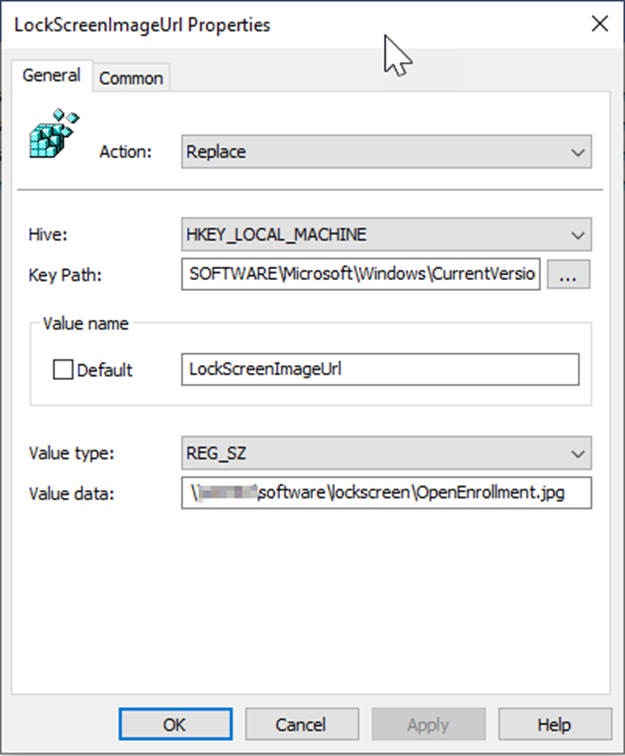
LockScreenImageUrl: Action=Replace
PersonalizationCSP: Action=Create
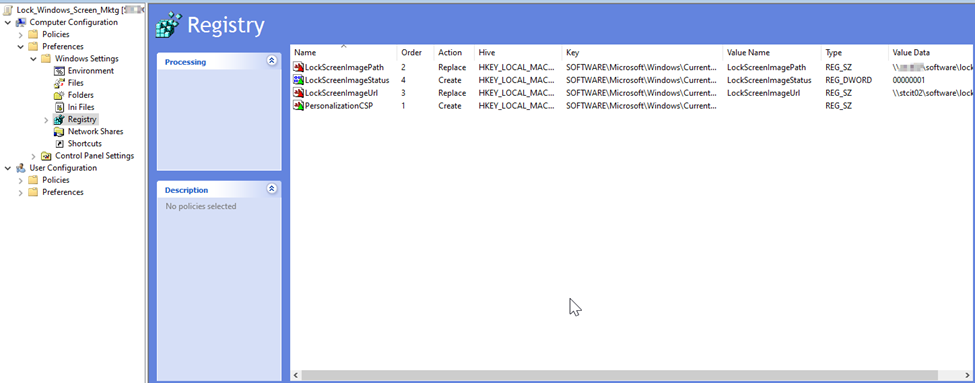
KeyPath = SOFTWARE\Microsoft\Windows\CurrentVersion\PersonalizationCSP
KeyPath = SOFTWARE\Microsoft\Windows\CurrentVersion\PersonalizationCSP
KeyPath = SOFTWARE\Microsoft\Windows\CurrentVersion\PersonalizationCSP
KeyPath = SOFTWARE\Microsoft\Windows\CurrentVersion\PersonalizationCSP
Steps to push Disable Lock Screen
To disable the lock screen, just set the Action to Delete for the 4 registry items.


Just came here to tell you, that you are the hero. Spent a few days trying to solve this issue and just found an answer here. Just one thing- edit this part: LockScreenImagePatch: Action=Replace
Andrius, I’m so glad this helped you. Thank you for your comments.
Brilliant!