Configure Azure Enterprise Application Permissions
Summary
There are times when a company will need to add and grant permissions to a specific third party application in their M365 tenant such as Workday or Calendly. The process below describes how to do this.
Audience: IT Administrators
Step 1
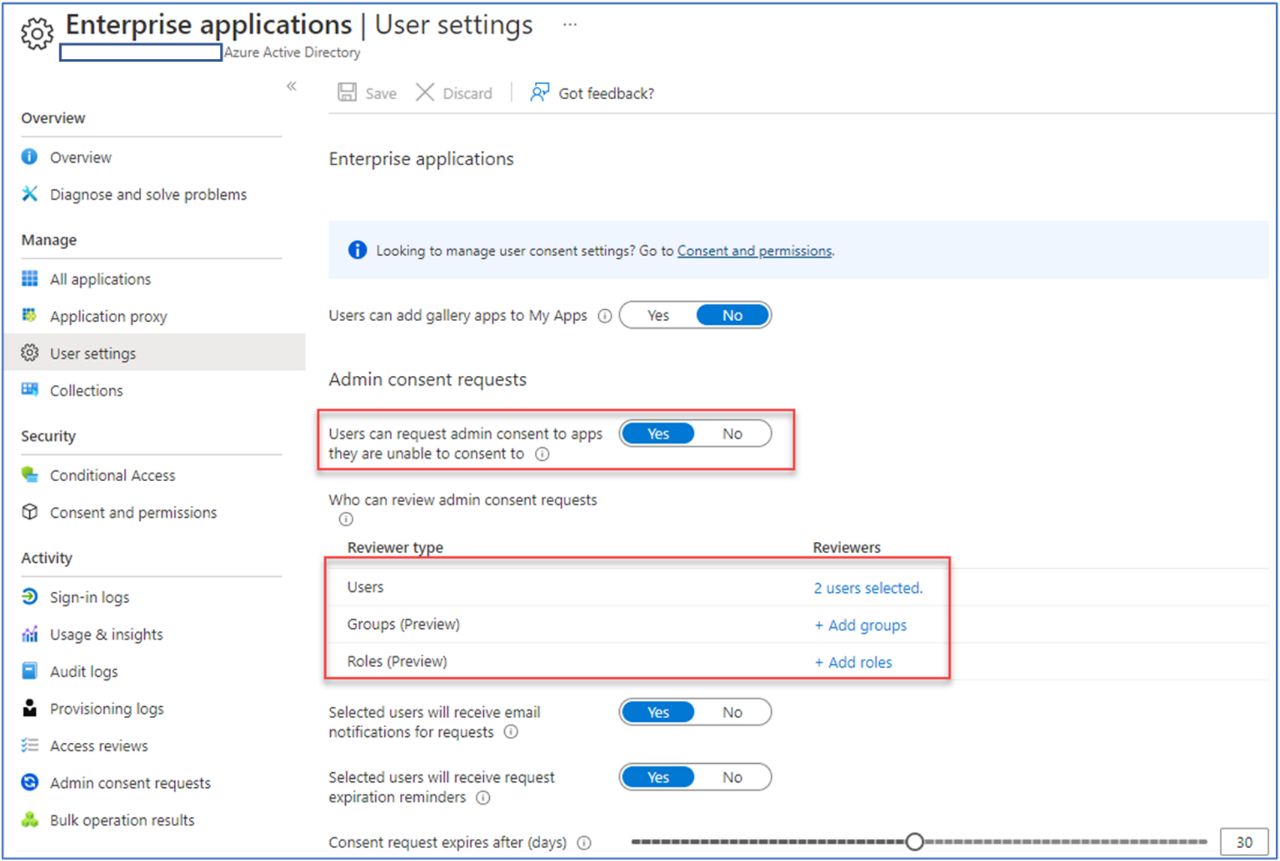
You must enable the admin consent workflow in Azure (one time only). The reason for this is because most M365 tenants will be locked down and NOT allow users to automatically add applications to the company M365 tenant. That would be a bad idea. Therefore, you can configure the tenant to require admin consent before the application is granted permissions.
- Sign into the Azure Portal
- Search for and select Azure Active Directory
- Select Enterprise Applications
- Under Manage, select User Settings. Under Admin Consent Requests, select Yes for Users can request admin consent to apps they are unable to consent to.
Step 2
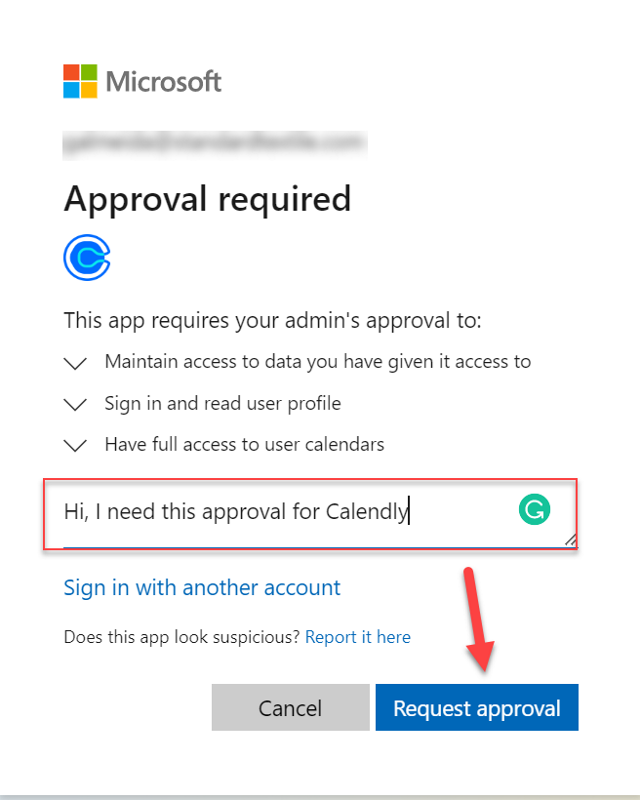
When the user goes to Request Approval for the first time only, they will receive a popup like the one below requiring them to enter a brief explanation of why they are requesting approval for the app and then will need to select the Request Approval button.
Step 3
The approvers (normally Azure Admins) will receive an email stating that there is a pending application approval in Azure. The user will also receive two emails: (1) stating their request for approval has been submitted and (2) when their request for approval is approved or denied.
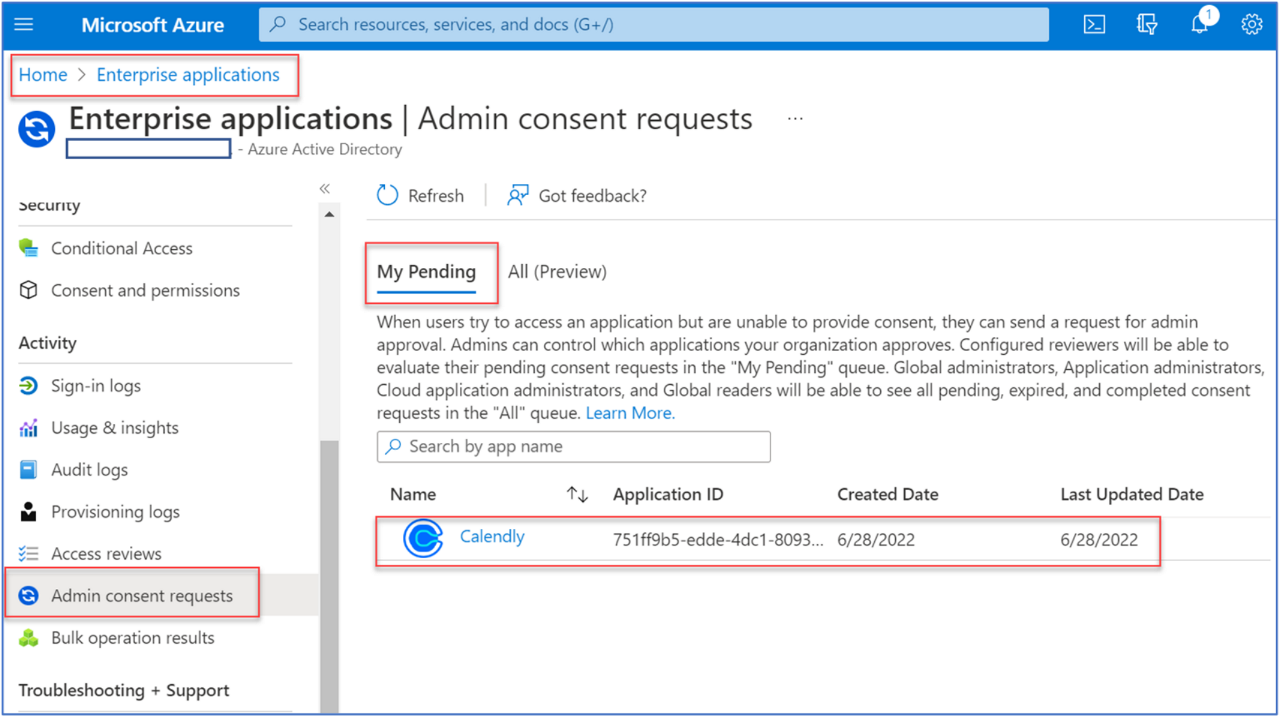
Step 4
The Azure Admin needs to either approve or deny the request using the steps below.
- Sign into the Azure Portal
- Search for and select Azure Active Directory
- Select Enterprise Applications
- Under Admin consent requests, select My Pending. You should see any pending requests. Select the application (in this example it is Calendly)
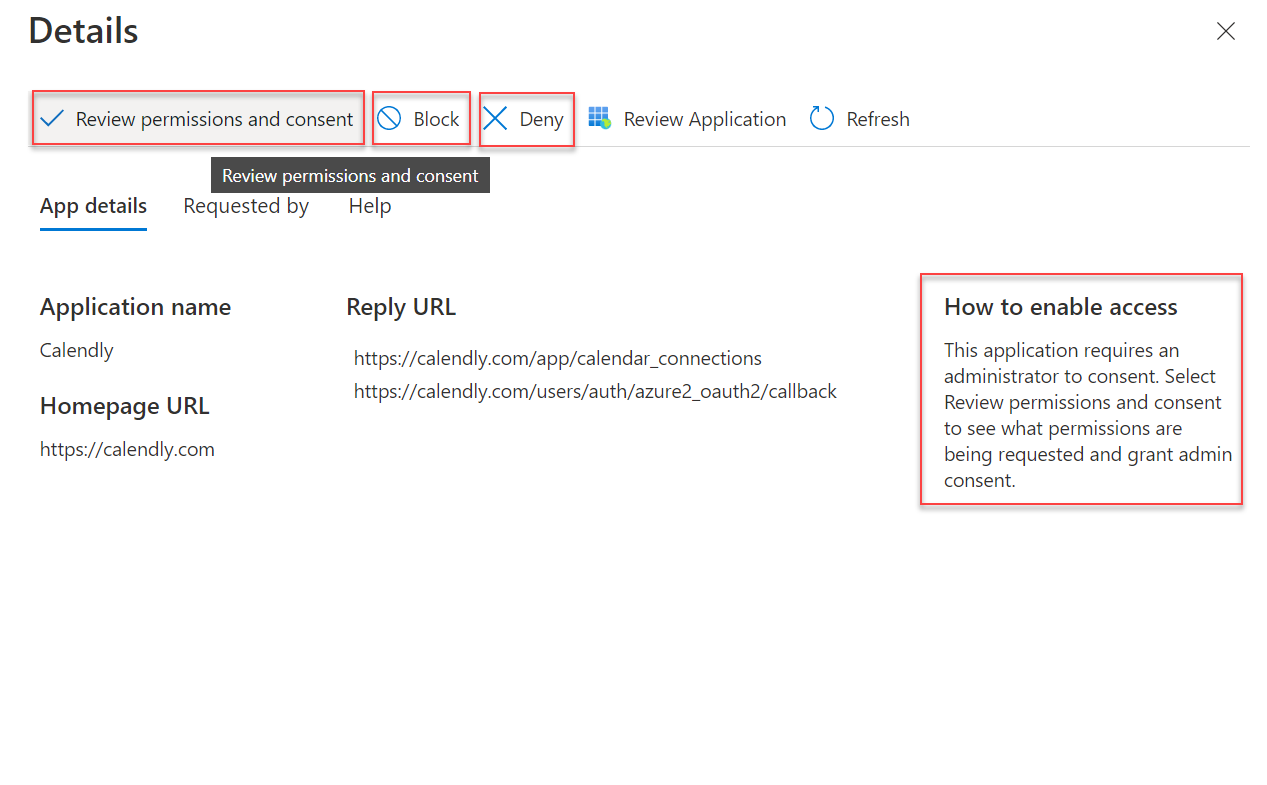
Step 5
The Azure Admin can now Review permissions and consent, Block or Deny the request. Before approving any application in the tenant, always make sure to properly vet and get your security team’s approval.
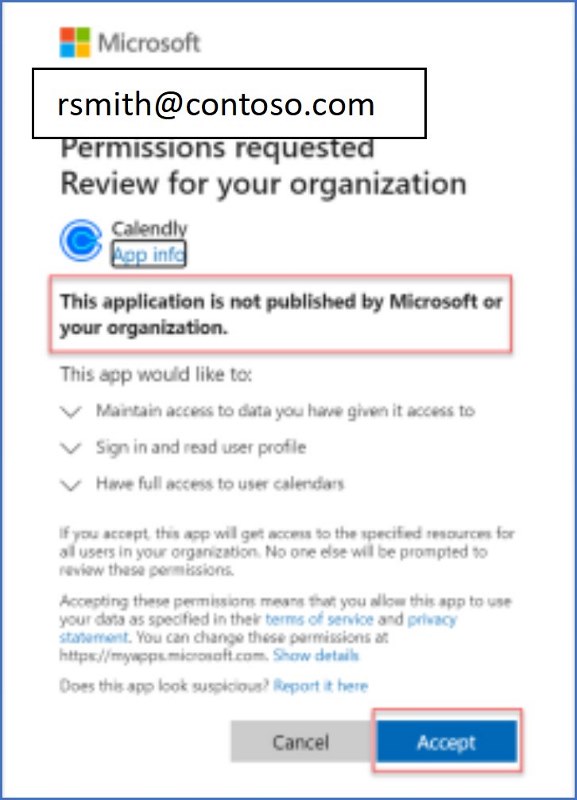
You may receive another confirmation popup like the one below. Select Accept to continue
From here on out, when a user attempts to use this application in the company’s M365 tenant, they will no longer be prompted to “request approval”.
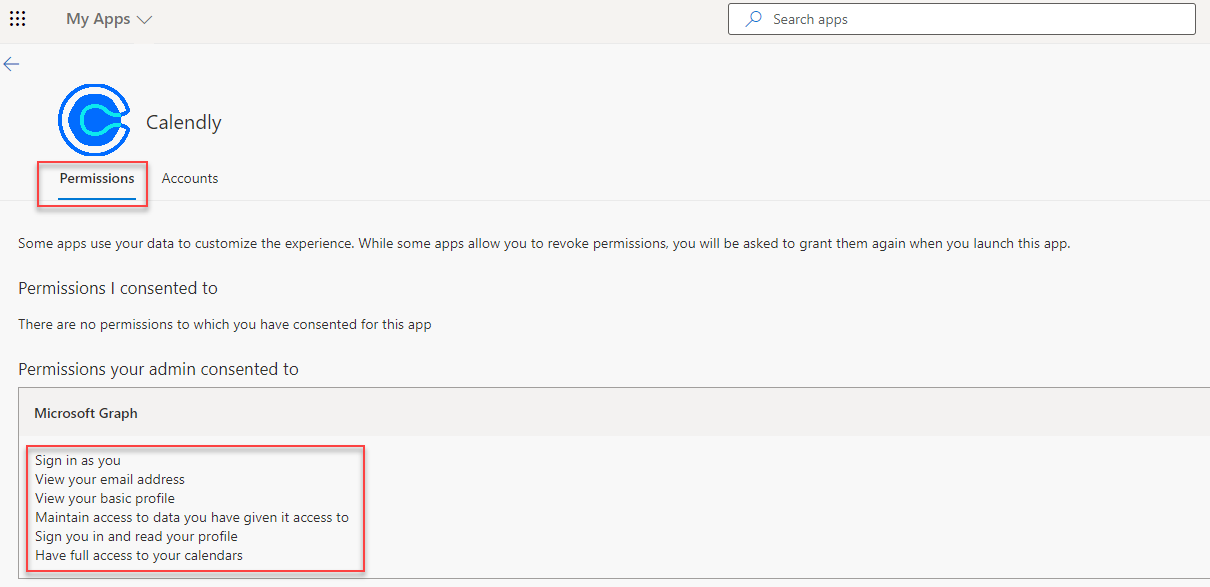
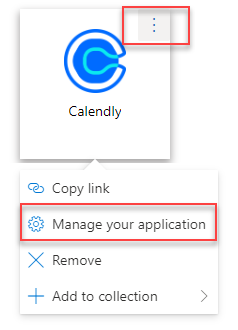
If you ever need to view all the approved apps in your M365 tenant to view the exact permissions given to each application, navigate to https://myapps.microsoft.com/. You will see a similar screen.
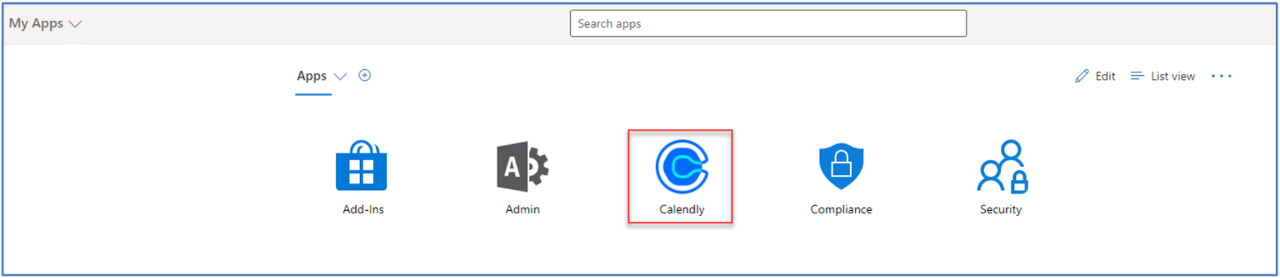
Note, the Calendly app that was just added and granted permissions to the Azure tenant. To view and manage the permissions for an app, hover your mouse over the ellipses, and select Manage your application.
Under Permissions your admin consented to, expand the Microsoft Graph to view the specific permissions granted to the enterprise application.